Create Long Running Service (Wordpress) using ALB, ECS, EFS, and RDS
Welcome! The purpose of this page is to create an architecture and deploy Wordpress to it. We'll walk you through the steps to create a new deployable architecture on AWS using ALB, ECS, EFS, and RDS.
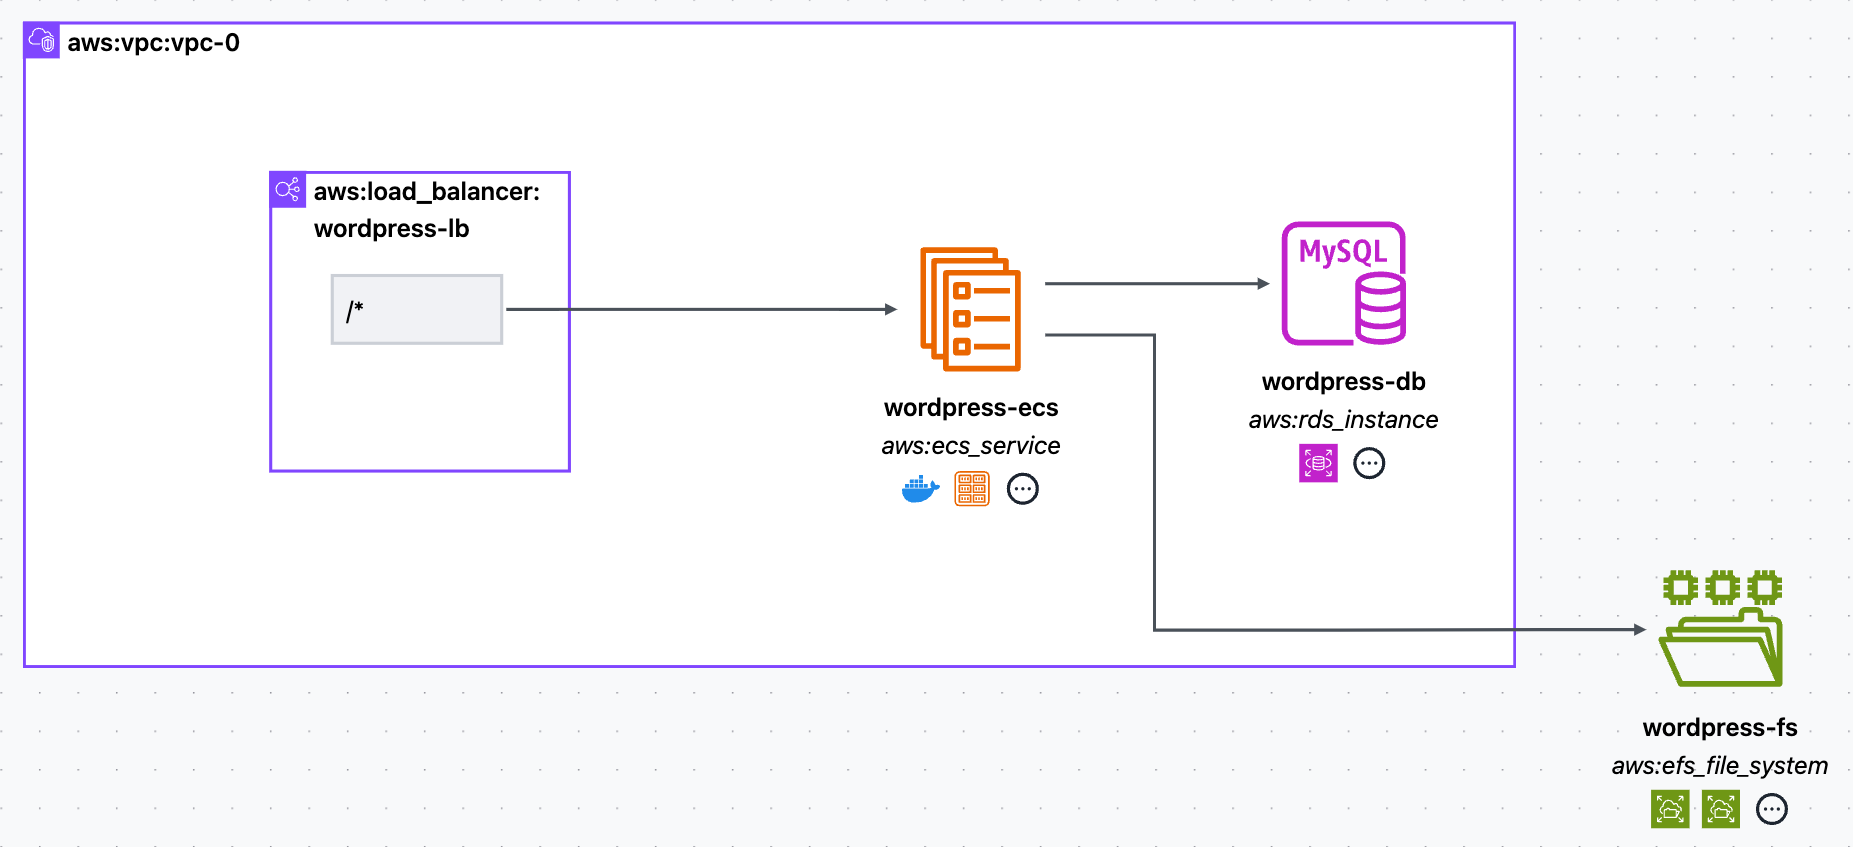
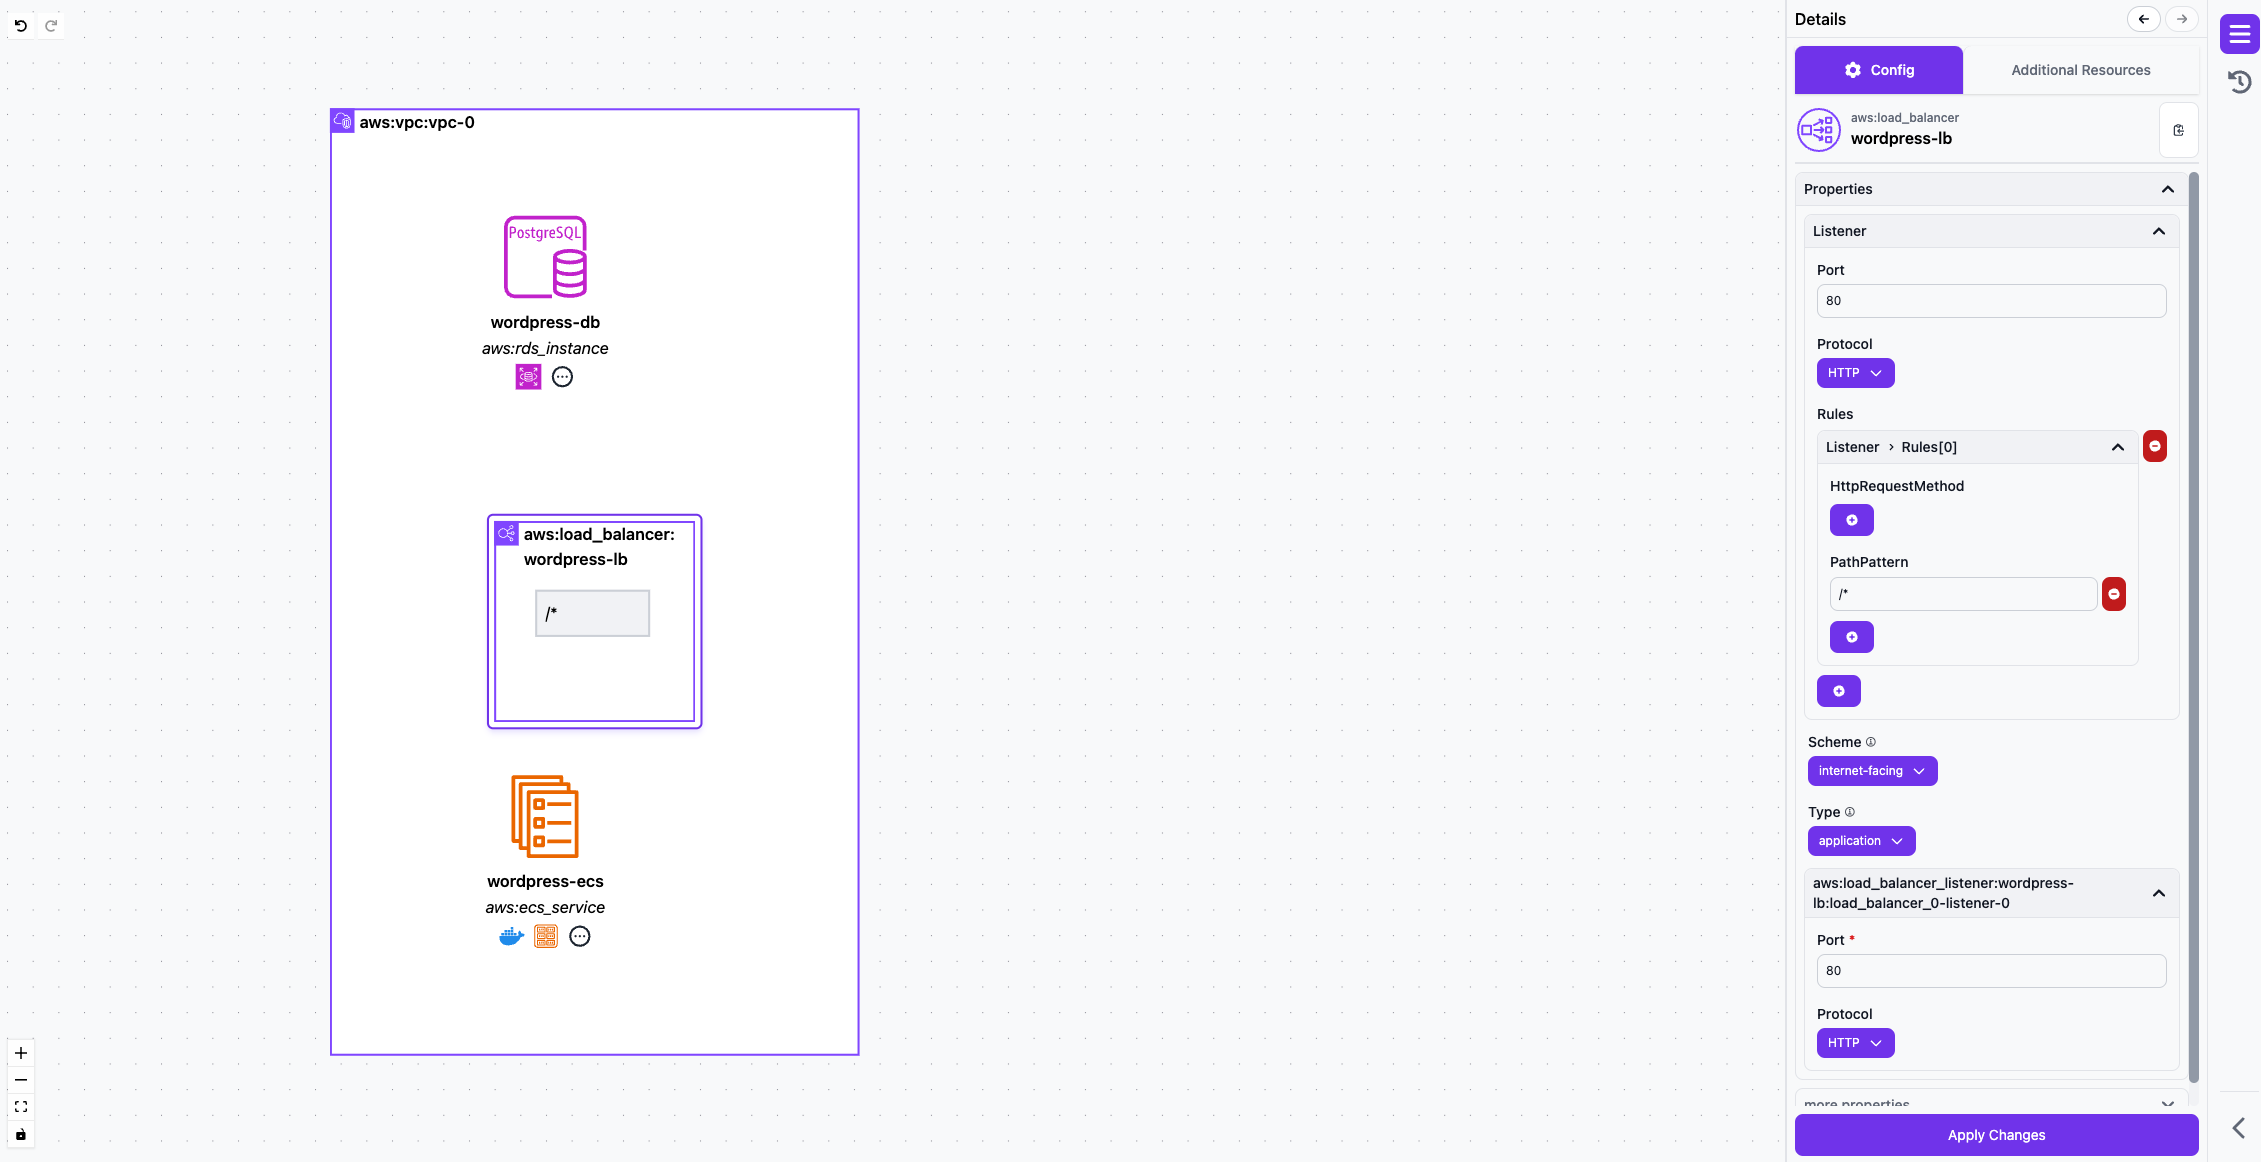
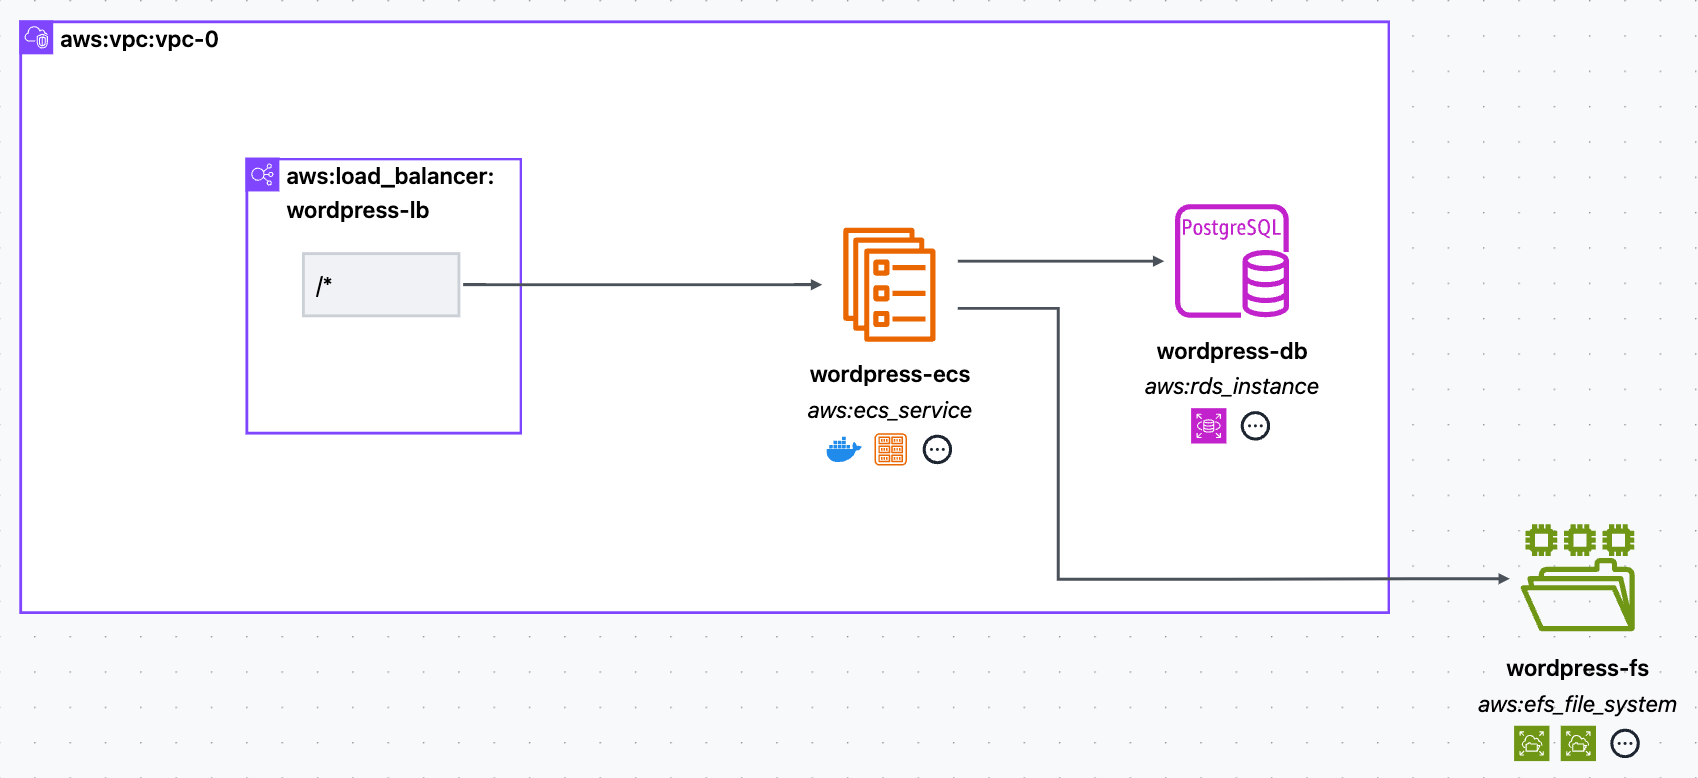
Architecture
If this is your first architecture, take a look at the Getting Started Guide. When we're done, we'll have created the following architecture:
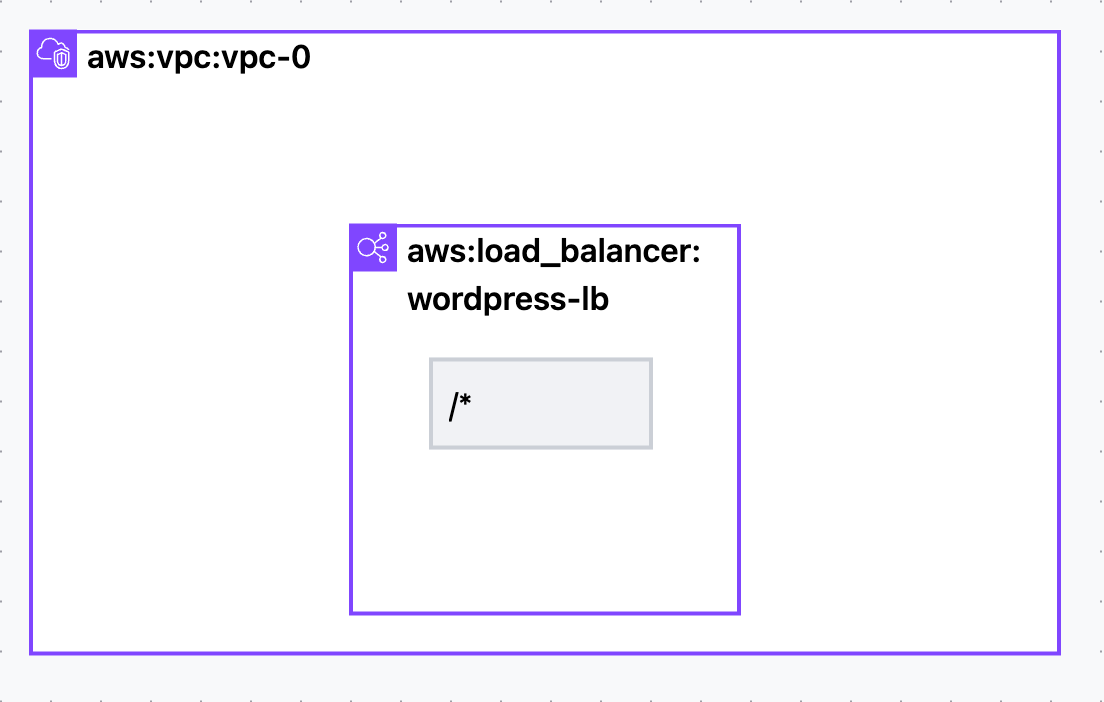
Step 1. Drag in a Load Balancer
- Locate the Load Balancer resource in the left sidebar
- Drag it onto the canvas
- Click on the resource's name and rename it to wordpress-lb
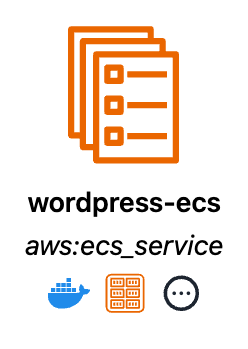
Step 2. Drag in an ECS Service
- Locate the ECS Service resource in the left sidebar
- Drag it onto the canvas
- Click on the resource's name and rename it to wordpress-ecs
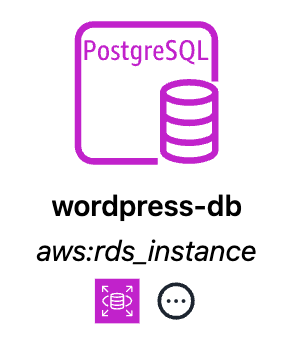
Step 3. Drag in an RDS Instance
- Locate the RDS Instance resource in the left sidebar
- Drag it onto the canvas
- Click on the resource's name and rename it to wordpress-db
Step 4. Drag in an EFS File System
- Locate the EFS File System resource in the left sidebar
- Drag it onto the canvas
- Click on the resource's name and rename it to wordpress-fs
Step 5. Configure the Load Balancer
- Select the Load Balancer by left-clicking it
- On the right side-bar ensure that the config tab is selected
- Set the Scheme config to be the value
internet-facing - Click Apply Changes in the lower right
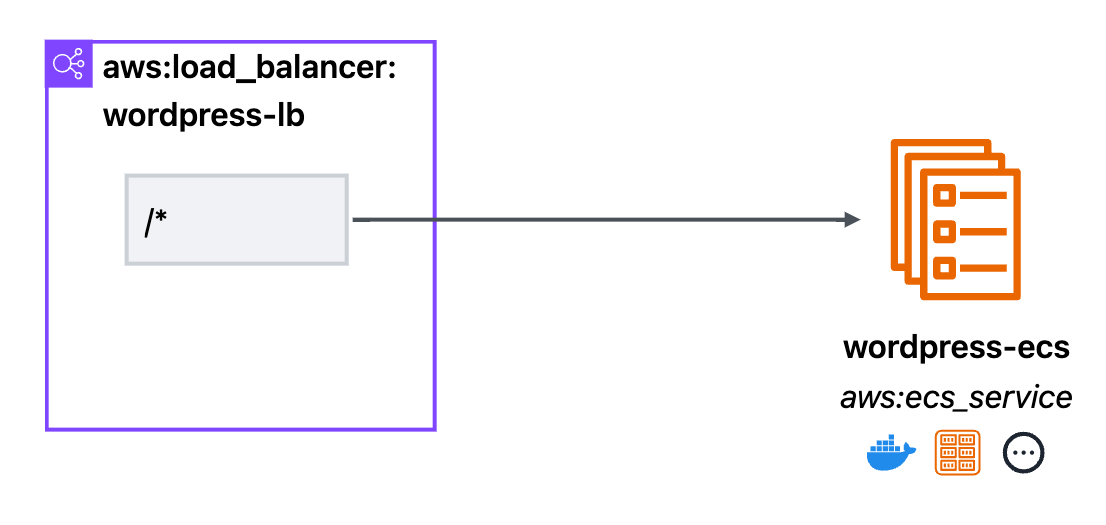
Step 6. Connect the Load Balancer to the ECS Service
- Hover over the Load Balancer and click and drag the purple arrow to the ECS Service icon
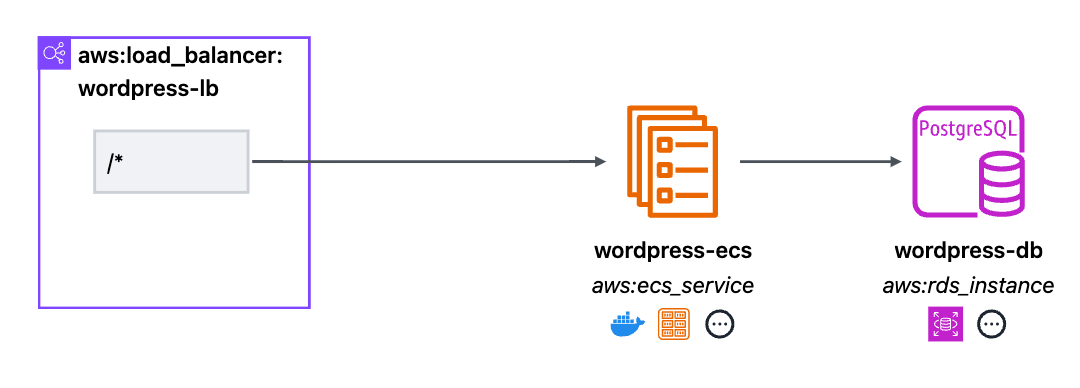
Step 7. Connect the ECS Service to the RDS Instance
- Hover over the ECS Service and click and drag the purple arrow to the RDS Instance icon
Step 8. Connect the ECS Service to the EFS File System
- Hover over the ECS Service and click and drag the purple arrow to the EFS File System icon
Step 9. Configure the ECS Service
- Select the ECS Service by left-clicking it
- On the right side-bar ensure that the config tab is selected
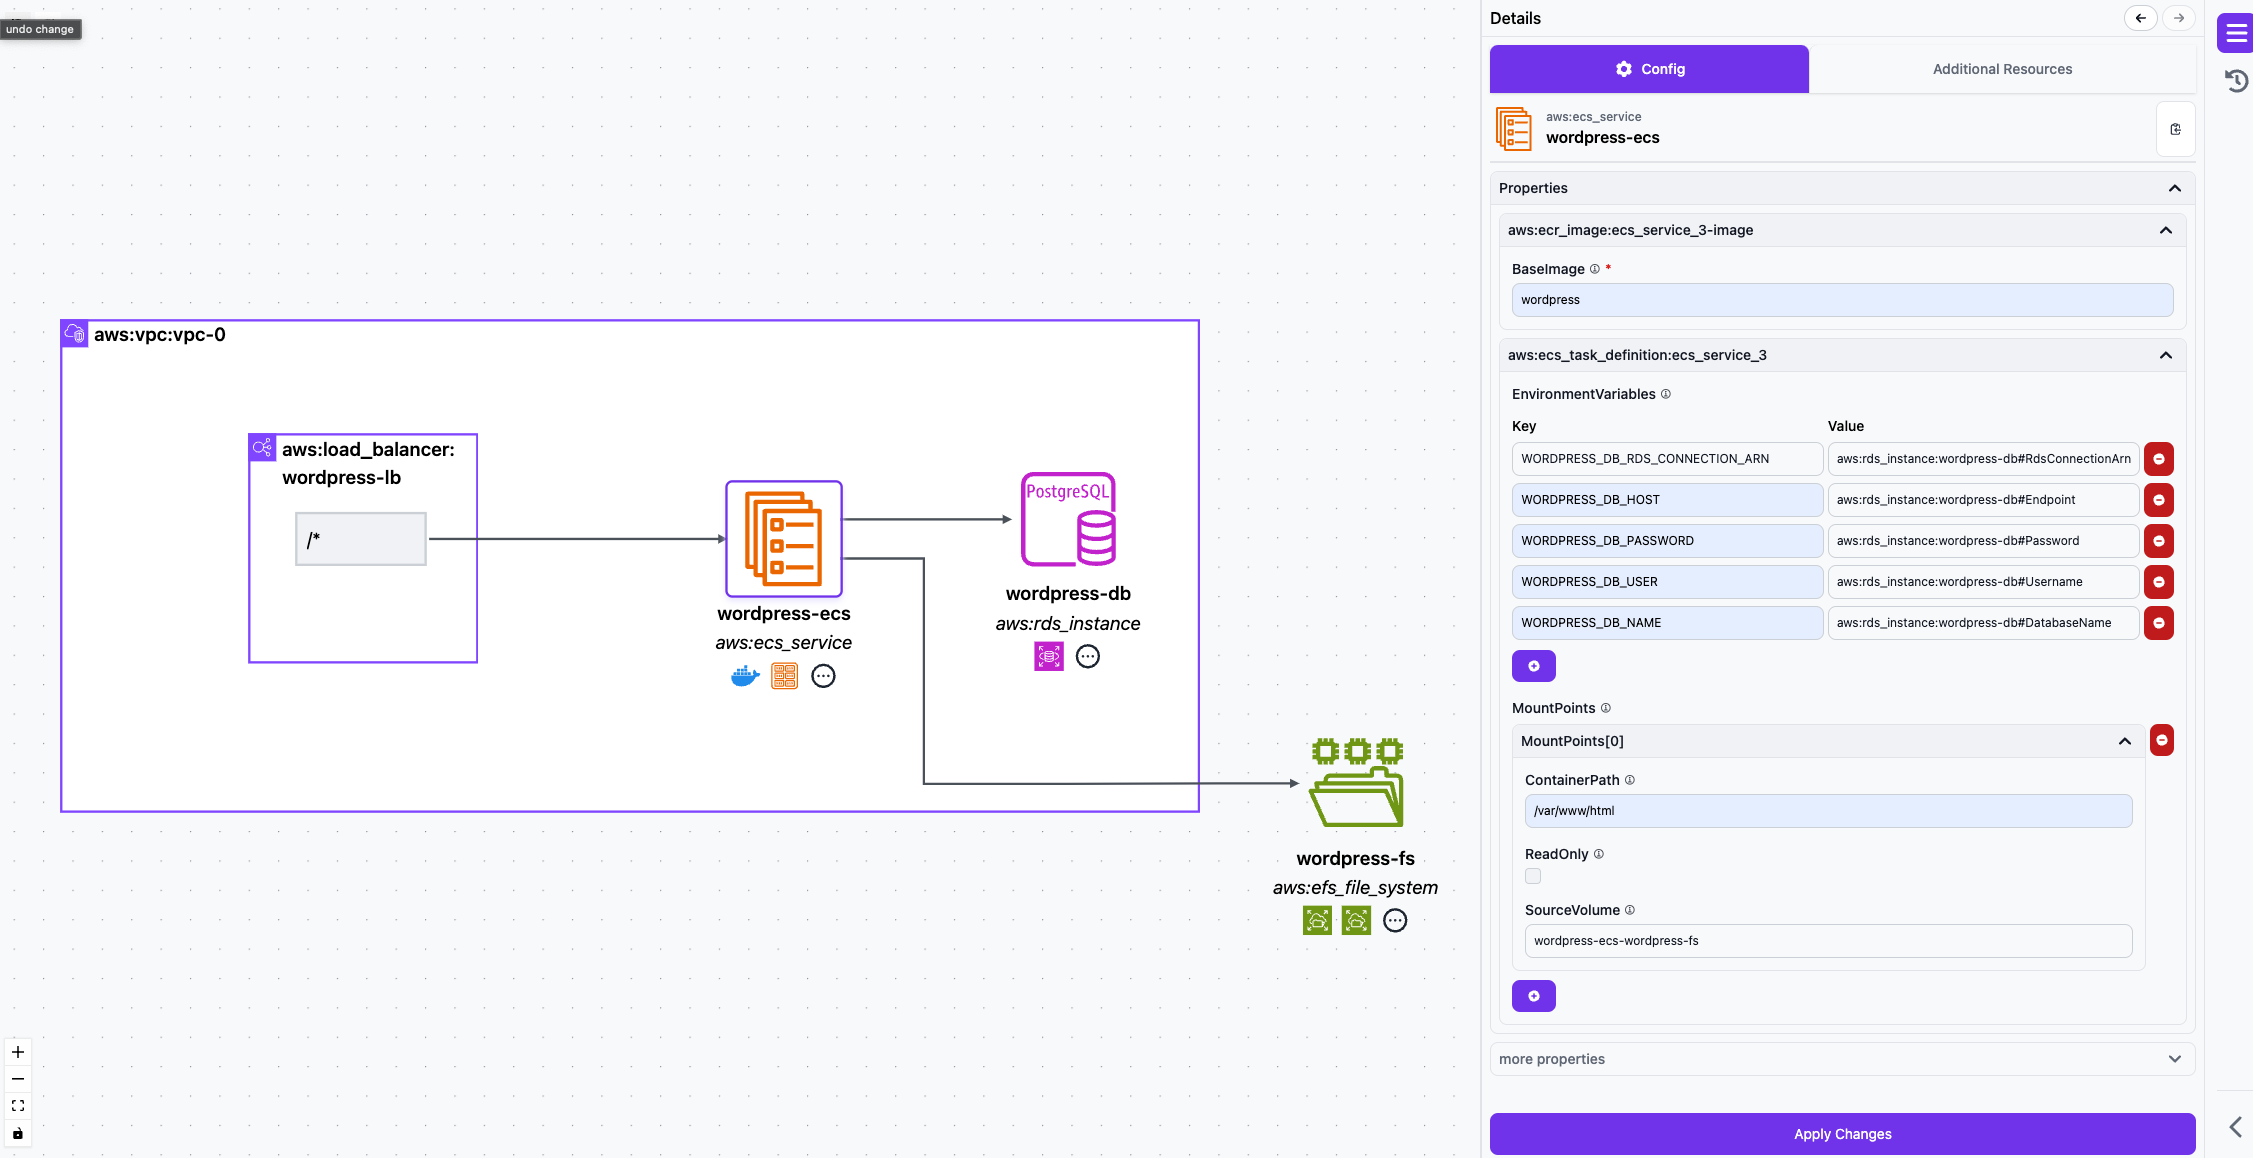
- Set the base image to be
wordpress - There should be some pre-populated environment fields referencing the RDS Instance we created earlier
- Modify the names of the pre-populated fields or create the following environment variables by hitting the + sign at the bottom of the list. The key and values should be:
WORDPRESS_DB_HOST=aws:rds_instance:rds-instance-4#EndpointWORDPRESS_DB_USER=aws:rds_instance:rds-instance-4#UsernameWORDPRESS_DB_PASSWORD=aws:rds_instance:rds-instance-4#PasswordWORDPRESS_DB_NAME=aws:rds_instance:rds-instance-4#DatabaseName
- Set the Container Path Field to be
/var/www/html - Click Apply Changes in the lower right
Step 10. Configure Health Checks
- Click the edge between the Load Balancer and ECS Service
- On the right side-bar select the "Additional Resources" tab
- Click on
aws:target_group:<your load balancer name> - On the right side-bar select the config tab
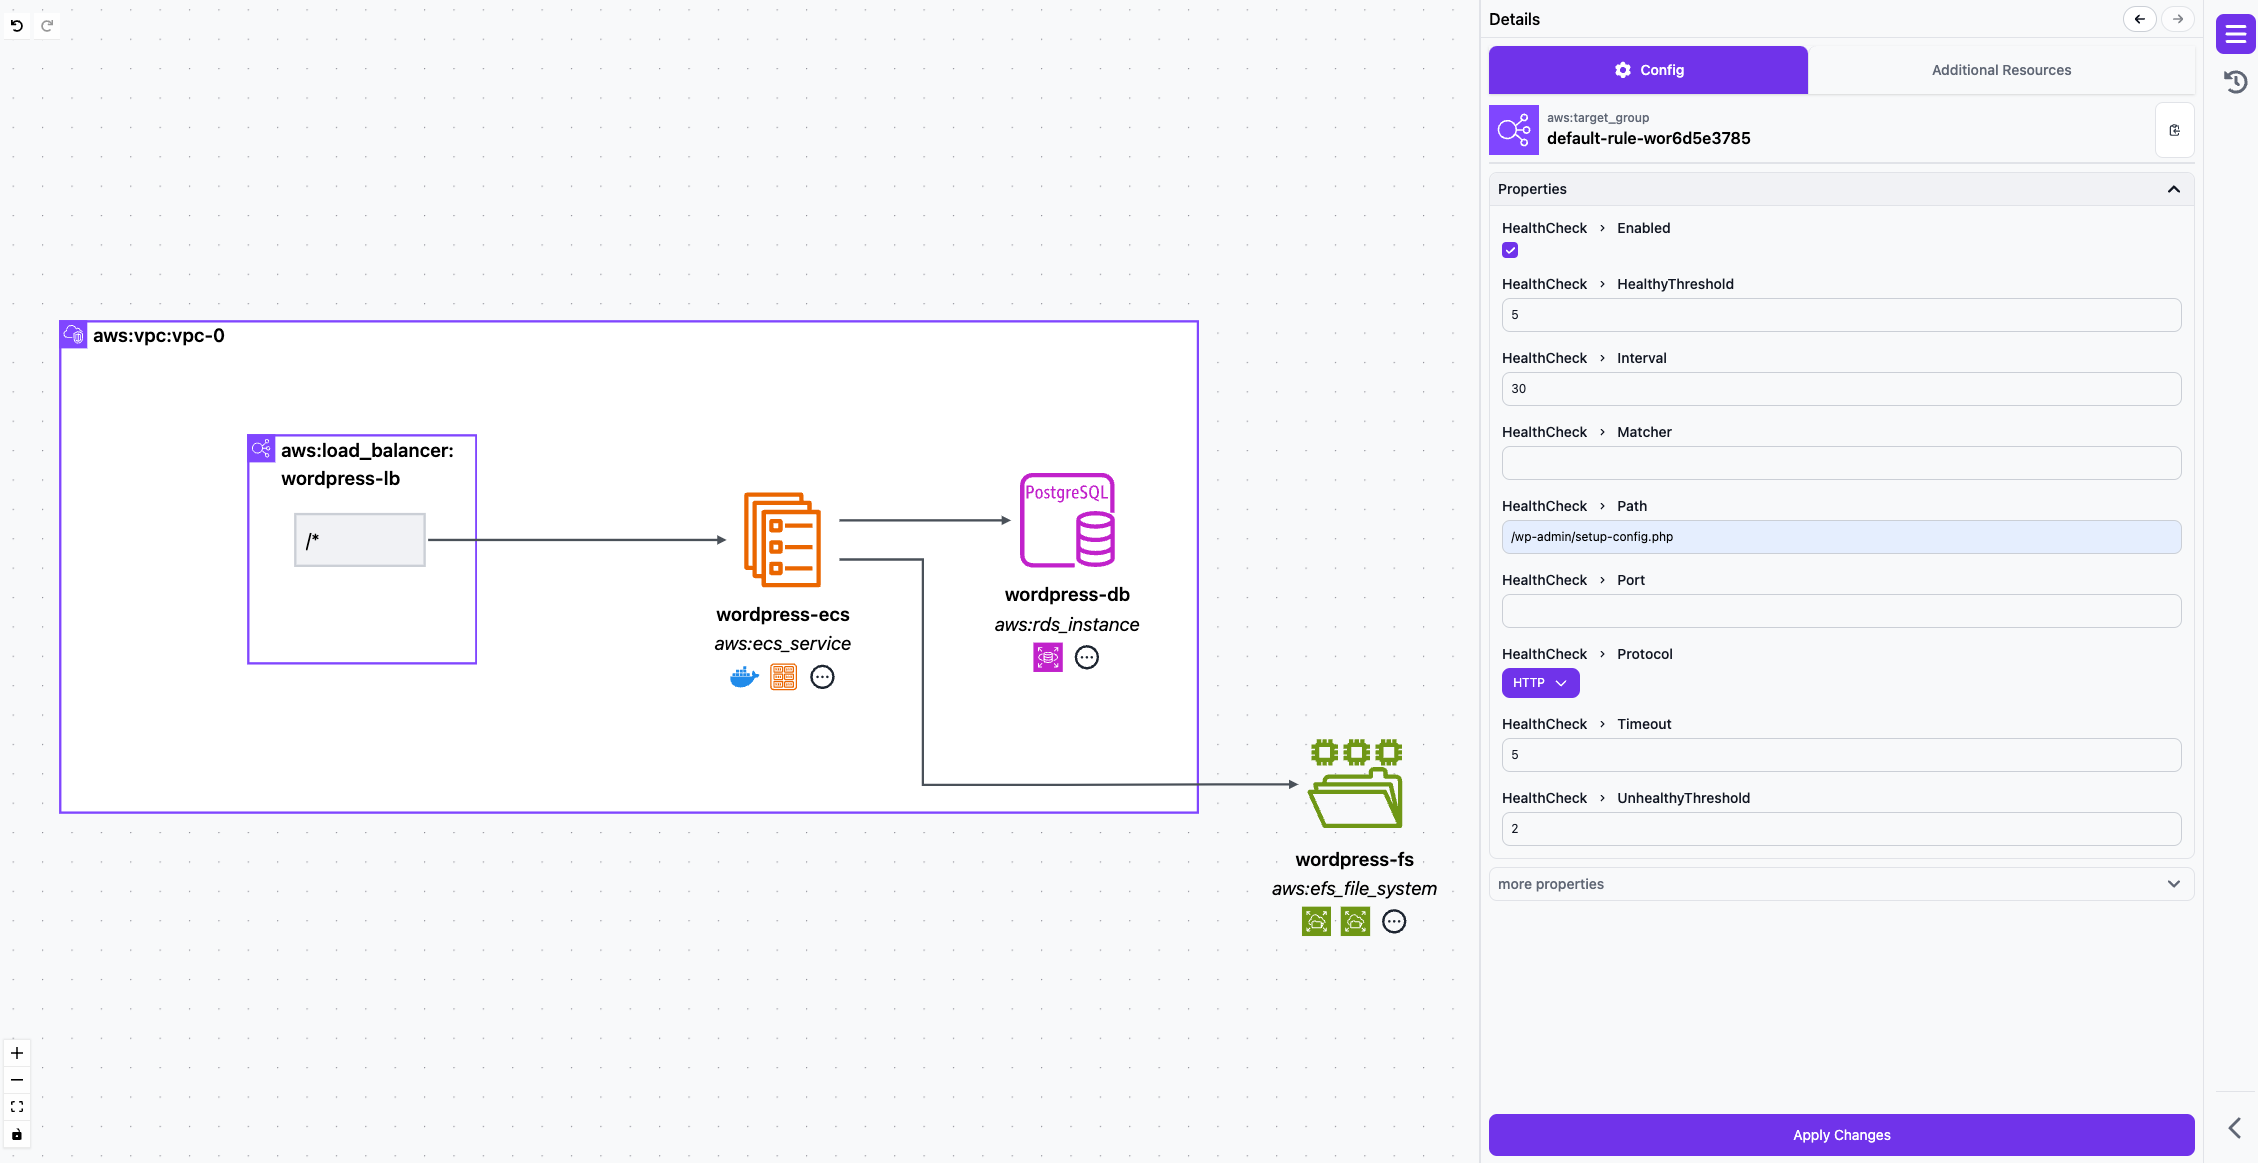
- Set the Health Check > Path field to be
/ - Click Apply Changes in the lower right
Step 11. Configure the EFS Access Point
- Select the EFS File System by left-clicking it
- Set all UID and GID fields to be
33(this is the UID and GID for the www-data user in the wordpress container) - Click Apply Changes in the lower right
Step 12. Configure the RDS Instance
- Select the RDS Instance by left-clicking it
- On the right side-bar ensure that the config tab is selected
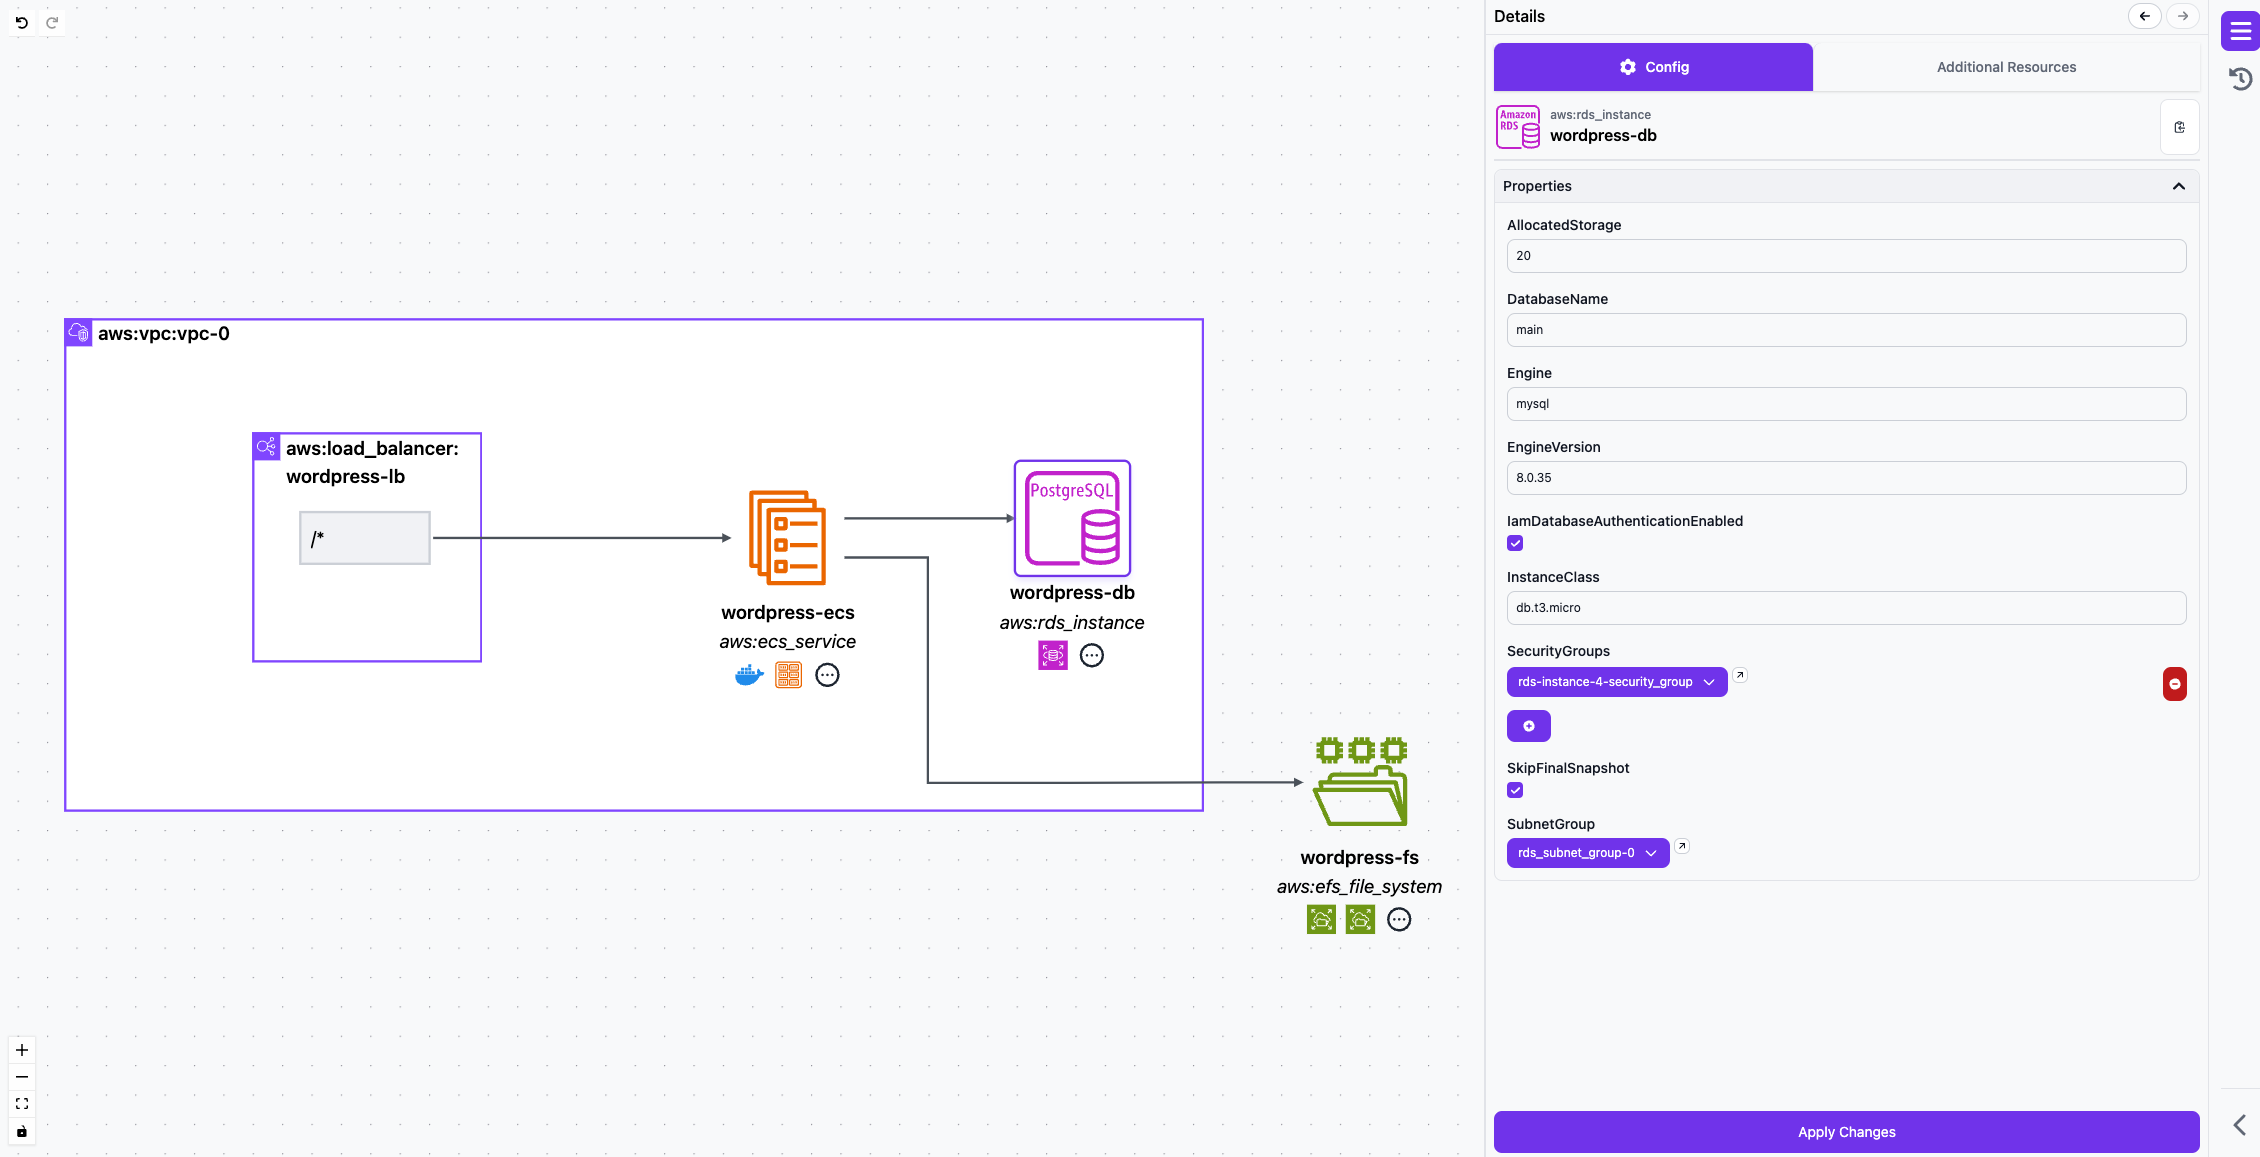
- Set the Engine config to be the value
mysql - Set the Engine Version config to be the value
8.0.35or any version supported by wordpress and AWS that you desire. - Click Apply Changes in the lower right
Step 13. Export IaC (Pulumi)
- Click the Export IaC button on the top of the screen, this will download a zip file with the name of your architecture containing all the IaC to deploy it.

Step 14. Local Docker, Pulumi, and AWS Setup
- Create an AWS user with admin permissions
- Follow the Pulumi guide to setup Pulumi with AWS using your credentials
- You'll also need to install Docker for building a container and fetching images from DockerHub
Step 15. Deploy to AWS
- Extract the IaC from the zip file
- Navigate to the directory
- Run
npm install - Run
pulumi stack init - Give your stack a name
- Optionally specify a passphrase
- Specify your region
pulumi config set aws:region us-east-1change us-east-1 to whichever region you desire - Create a custom username and password for your first database by running:
pulumi config set --secret klo:wordpress-db-username <dbuser>andpulumi config set --secret klo:wordpress-db-password <dbpassword>replacing<dbuser>and<dbpassword>with your desired values ensuring you meet mysql username and password validation requirements - Run
pulumi up - Review the plan and type
yesto deploy - Grab the
wordpress_lb_DomainNameas that was reported afterpulumi upcompleted - Although the stack is up it may take time for certain configuration and changes to propograte
Step 16. Access Wordpress
- Navigate the
wordpress_lb_DomainNamewe captured in the previous step - You should see the Wordpress setup page
- Feel free to setup Wordpress as you see fit, plugins will install to the EFS filesystem we created earlier
Step 17. Tear down Infrastructure
- From the same directory
pulumi destroy - Confirm with
yes
Step 18. Share Feedback
We look forward to seeing what amazing things you build. If you get stuck or want us to support a capability, please join our Community Discord, where the whole team hangs out and is happy to help.